Sunday, December 15, 2019

December Soap Challenge - Black Tie Affair

This month's challenge was to make a soap that was mostly black and white with a single accent color. I chose to use this opportunity to practice and learn techniques that were new to me.  I have been subscribing to the tutorials since June or July but I haven't really had time to try as many as I would like. I worked on three of them this month, the pull through technique, the circling Tawain swirl and the Mantra Marbles technique.

The first technique I tried was the pull through method. After the first attempt it was clear that while it makes really fun soap designs, it was probably not the best technique for getting clear black and white. That didn't stop me from making a few more batches. All three batches shown are made with black, white and a single color. The first was a green mica with tea tree and spearmint, the second was annato with orange and patchouli and the third was alkanet with lavender.
This is the trimmed strainer I used. It cost less than
three dollars at Ross.                                                


Another technique I worked on was the circling Taiwan swirl. I made two batches, the first batch was made with charcoal, kaolin clay and indigo. It was scented with eucalyptus and peppermint. I really liked the result but the colors were not distinct enough to show up well and the indigo was too gray. The second attempt I used green sea clay and spirulina instead of indigo. I over mixed it so it wasn't very fluid. The results remind me of dead underwater plants but I like it anyway.

My Indigo batch:
 

My other batch:

The other technique I worked on was a variation of the mantra marble swirl. I figured I could use a loaf mold instead of a slab and cut it horizontally and make smaller batches this way. Here are my first two tries. The pink one had too many air bubbles in the black and the black in the blue one wasn't consistant in color and texture. I was surprised how a small amount of color, aproximately 1/6 of the overall soap looked like so much more!
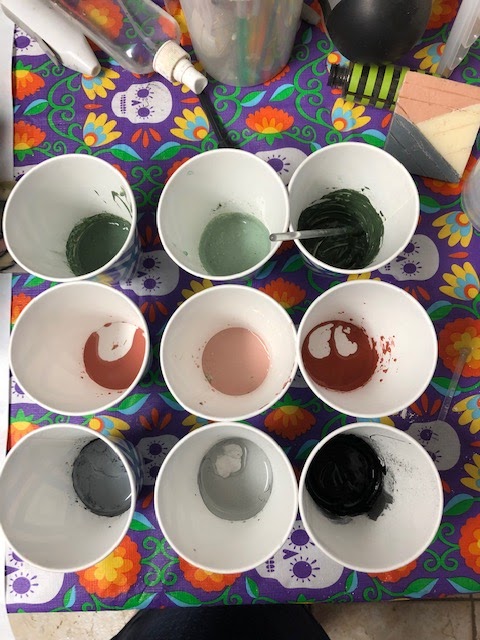
For my next soaps, I played around with how I added the soap to the marbled side and I switched from black to white for my solid side. I added the soap on the marbled side using paper cups and a wall pour instead of squeeze bottles. I combed my soap one stroke at a time rather that making a combing tool like in the tutorial and I also changed my swirl from a figure 8 to circles. My inspriation for this came from watching Youtube videos by Etsuko Watanabe. So the result is a highly modified mantra marble soap. I have a solid side and a mixed side and I have swirls between them.   I hope I didn't use too many techniques since it is hard to tell what constitutes a new technique and what is part of a multipart technique.
The fragrance I used made the white a slight yellow color.
Here is the soap I am entering. The black is from charcoal, the white is titanium dioxide and French White Shimmer Mica and the blue is Peacock mica from Mad Mica. The fragrance is Sea Salt & Driftwood from WSP which behaved extremely well. I have a small amount of stray black in the white from black leaking under my divider I think. I would like to try again and make sure I pour some white on both sides of the divider before pouring in any black to see if this results in less black leakage.


Taken outdoors, looks a little washed out

All together I made 9 different soaps using black, white and an accent color and I like them all. The best part of this challenge was being able to try some of the techniques that I used to think were so impossible!


Tuesday, November 12, 2019

November 2019 Soap Challenge

November 2019 Soap Challenge - Soap Curl Designs


My matching bath towel

This month's challenge is to create a soap using soap curls. I chose to make a blue and white design because I really love all things blue and white.


The next decision was to decide if I wanted blue on white or white on blue.... hmmm. Why not both? I decided to try to make a double sided soap where one side would be blue on white and the other side would be white on blue. 

I used the recipe provided with the tutorial for the soap curl soap. I had previously made loaf dividers based on Teri Endsley from Tree Marie Soapworks' tutorial "How to Make Your Own SoapMold Dividers"

I used my 4 section divider and poured alternating blue and white sections. After the soap was set, I split the loaf down the middle which gave me two strips of blue and white to cut curls from. I didn't take any pictures of this because I had pretty low expectations about how successful I would be and I expected I would be repeating the process several more times. Here is a picture of the dividers and part of one of the strips after I had planed off my curls.
 

I used a soap planer to make my curls. I adjusted the blade to get thicker curls. I wasted quite a bit of soap before I got the curls I wanted but because I had two strips of soap the cut from, it worked out fine. I wanted large, loose, flowing curls for my design. Given that the humidity was around 6% on the day I was soaping (Southern California Santa Ana weather conditions) I don't think I could have made tight curls even if I had wanted to. I found that I needed to shape the curls as I made them or be stuck with a lot of blue and white flat crumbly strips. This is my planer and these are the curls I made shaped the way I wanted them in my soap.


When the strips became too small for me to plane without peeling my knuckles, I used a lip balm tube with the end cut off to cut out little plugs to place in and around my curls as random polka dots. I still had lots of leftover scraps.


I used a portion of my slab mold which is actually a box my dad built many years ago to hold a telescope mirror he made.


I determined the amount of soap I needed to fill my mold half way and made a batch of white soap in this amount. I made marks on the freezer paper so I would know about how full to fill it. I placed the curls in the white soap and semi randomly arranged the polka dots. 


While this layer set up a bit, I made my blue layer.
I oven processed it for a couple of hours but then someone needed to use to oven so I took it out. It still gelled just fine. Unmolding this soap was fun. I scraped off some of the blue soap to reveal the design. I was really happy with how it came out. At first I was concerned that my design was too large and would be lost when I cut the soap into smaller bars but I was pleasantly surprised by the result.
 

 In the white layer, there are glycerin rivers, mostly on the edges of the curls outlining them. I like the effect.

I like the way this batch turned out and I decided that this soap would be my entry. I have taken oodles of pictures of my soap, trying to learn how to take better pictures with my phone in different light and with different backgrounds. Here is a sample of some of my pictures. My soap is scented with a mix of Black Tea and White Tea and Ginger from Brambleberry. I like both fragrances so I decided to use some of both. 
In my kitchen
Too high of an angle
Most realistic color

I like this one

Too dark but I like the pink
Too dark, the color is off

This one is ok
A little too dark

Way too dark
Way too dark

This one is ok
Stonehenge style

Too many shadows but I like it anyway

This was a really fun technique to learn. I am sure there will be some amazing soaps for this one. I really like doing these soap challenges because it is like taking a class where each month we get some instruction and then we have our assignment and our assignments are so much fun! It's project based learning at its best! I have been a teacher for over 30 years now so I always look at things from a teacher's perspective. This year I have a group of students in my chemistry class that wanted to learn how to make soap after I told them about my hobby, so we formed a little group that meets after school and they are going to learn some soap making. They made a recipe last week and this coming week they will make their first batch of soap. I can't wait to see how they do!


Sunday, October 20, 2019

October Soap Challenge

Slanted layers - This month's challenge was to create a slanted layer soap, rotating the mold at least once during the process. I did not attempt the chevron challenge but it does look like it would be fun.

The hardest part is choosing the right fragrance that would accelerate the soap at just the right speed. The soap needs to be fluid when poured but it also needs to set up quickly so the next layer can be poured. Time to break out the florals! During this challenge I made soap using Brambleberry's English Rose, WSP Magnolia blended with 15x orange essential oil (mmmm... love this blend!) and Brambleberry's Baby Rose. I also colored all of my layers with clays and activated charcoal. For the green, I also added a little spirulina powder.

Another hard part of this challenge was the time constraints I had to work with. To have a nice flat layer, I needed not to overmix but this also meant waiting longer for it to set. I had to make sure my remaining batter stayed fluid so I had to keep them stirred. This was doable but it took a long time and I got tired or I needed to go somewhere so I rushed things at the end and got a bit sloppy. But overall I had fun with this challenge and I made a lot of nice soap. I am afraid I am going to be like the neighbor that grows too much zucchini or I am going to have to become a compulsive hand washer to use up all this soap.

Here are some pics of some of the soap I made.
This was my first attempt. It is scented with Brambleberry's English Rose. There is a silver mica line between layers that doesn't show up well.

This one is a tribute to my love of geology. I call it "Angular Unconformity". The charcoal lines are really bad but I got some interesting textures in the different layers. This one is scented with magnolia/orange eo blend which smells heavenly but totally does not match the design.

I was in a hurry for this one. I was running out of some oils and using up some older oils I had on hand. It has some nice ingredients and the scraps I have tried so far... well this is the one that will make me a compulsive hand washer for sure. I was testing out colors and textures. I really like it even though the layers are not straight. I think it looks like a volcano.

Here are some pictures of the process I used. I mixed my lye into my oils at about 90 degrees. I barely mixed to emulsion and then split the batter into 3 large funnel pitchers.  I took one large funnel pitcher and split it into three smaller pitchers and the one by one did the layers at one angle adding the clays and the fragance and mixing with a mini mixer before pouring. Then when the parallel layers were set enough, I split up the next funnel pitcher and rotated the mold and repeated the process. The fragrance I used was Baby Rose from Bramble Berry. It worked well but I think I like the English Rose fragrance a little better.

Colors premixed

Larger mold used as a cradle

First layer poured

a second layer poured

mold has been rotated

After oven processing. The "rose petals" on the top are from leftover rose clay
Other pictures of my entry:


Photography is something I need to work on. I only have my phone to use and the lighting in my house is pretty bad. I have to search my yard for a place with good lighting that is not too bright and is neutral. Here is the place I found today where the bright sun hadn't reached  yet.
My box of soap. I think the dead weeds make a prettty neutral texture.

Stepping back a bit.

Stepping back a little more.

If I had to redo my soap, I would make some changes to the colors. The pinks were supposed to be three different shades of pink but I don't think they came out that way. I would leave the lightest pink as white and darken the darkest pink for better contrast. I am still not certain I like the green (my daughter likes it) I might have liked the top layer to be black or a dark gray instead. The top layer was rushed because I had to get to our Arts and Crafts Project 4-H meeting and needed to get the soap done. I am happy to say, I made it to the meeting on time... barely.